Essential Recovery Gear for Outback Touring
Disclosure: We may earn a small commission if you purchase through our links, at no extra cost to you.
Essential recovery gear outback: carry this checklist on every trip. Getting bogged in the outback isn’t a matter of if — it’s when. Soft sand, bulldust, mud after unexpected rain, and river crossings all conspire against even well-driven 4WDs. The difference between a 20-minute delay and a multi-day epic is what’s in your recovery kit and whether you know how to use it. This is your essential recovery gear checklist for outback touring: what’s genuinely essential, what’s worth carrying, and what you can leave behind.
One critical note before we start: recovery gear can kill. A snatch strap under load stores enormous energy, and failed attachment points become projectiles. Everything in this guide assumes you’ll learn proper technique — ideally on a 4WD training course — before you need it for real. If you’re heading into sand country specifically, read our sand driving guide alongside this checklist.
Tier 1: The Non-Negotiables
These five items should be in every 4WD that leaves the bitumen. No exceptions.
1. Rated recovery points (front and rear)
Before you buy a single strap, check your vehicle has proper rated recovery points — not tie-down points, not the tow ball (more on that below). Factory recovery points on modern 4WDs are usually adequate; older vehicles may need aftermarket rated points bolted to the chassis. If you don’t have rated points, nothing else in this list is safe to use.
2. Snatch strap (rated 2–3× your GVM)
The snatch strap is the workhorse of vehicle recovery. It’s a nylon strap designed to stretch ~20% under load, using kinetic energy to pull a bogged vehicle free. The rating rule: minimum breaking strength of 2–3 times your vehicle’s gross vehicle mass (GVM). For a typical 3-tonne touring 4WD, that’s an 8,000kg strap.
Crucially, match the strap to the lighter of the two vehicles in a recovery — too heavy a strap on a light vehicle won’t stretch properly and hammers both vehicles’ recovery points. Australian snatch straps must comply with the Australian Consumer Goods (Motor Vehicle Recovery Strap) Safety Standard 2017 — check the label.
Expect to pay around $95 AUD for a quality 8,000kg strap (Bushranger’s is $95 at ARB; their 8-tonne snatch kit with bag and shackles is $169). ARB’s Weekender Recovery Kit ($209) bundles an 8,000kg strap with shackles, gloves, and a bag — a sensible one-box starting point.
3. Rated bow shackles (×2 minimum)
Shackles connect your strap to your recovery points. They must be rated — look for the working load limit (WLL) stamped on the shackle, typically 4.75T for standard 4WD use. Unrated shackles from the hardware store are not recovery gear; they’re shrapnel waiting to happen.
Soft shackles (made from synthetic rope, ~$40–$60 each) are increasingly popular: lighter, safer if something fails (no metal projectile), and kinder to recovery points. Carry at least two of either type. Never use a D-shackle where a bow shackle is needed — the bow shape handles multi-directional loads.
4. Recovery boards
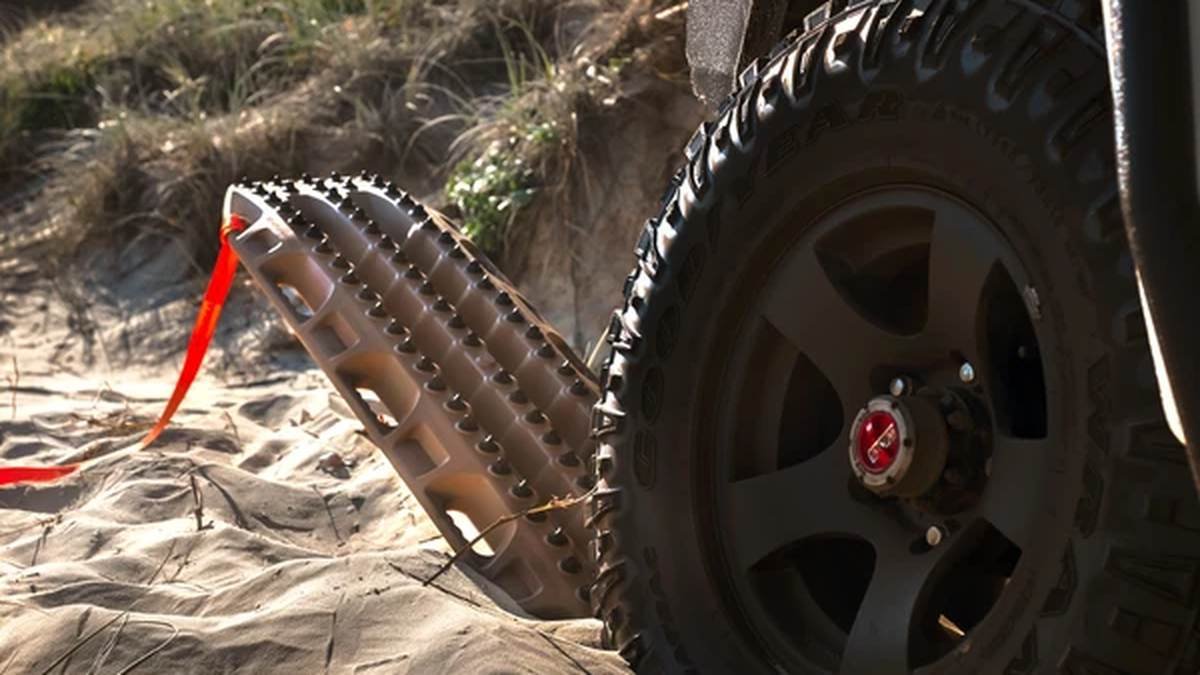
Recovery tracks (Maxtrax and similar) are the single most effective self-recovery tool ever made. Wedge them under the drive wheels, drive gently, and the cleats grip the tyre and ramp the vehicle up out of sand, mud, or snow. No second vehicle required, no kinetic energy, no drama.
Maxtrax MKII — Australian made, the original and still the benchmark — runs about $249.99 AUD a pair at BCF (RRP $299). The Xtreme version with replaceable alloy teeth is ~$519 at BCF. Cheaper alternatives exist from $100–$200 a pair; they work, but the nylon formulation and cleat design of the premium boards genuinely perform better and last longer. Given that a pair of boards can replace a $500+ winch for most bogging situations, they’re the best value in recovery gear.
5. Tyre deflator + air compressor
Most bogging is caused by too much tyre pressure, and most recoveries start with letting tyres down. You need a way to deflate (accurately) and a way to re-inflate afterwards. Staun automatic deflators (~$90–$100 for a set of four) screw on and stop at your preset pressure. For inflation, a 12V compressor is mandatory — the ARB CKMA12 single (~$441) is the benchmark; the twin CKMTA12 (~$817) is faster for big tyres.
Our tyre deflator and compressor guide compares the options in detail, including pressure charts for sand, mud, and corrugations.
Tier 2: Strongly Recommended for Remote Touring
6. Winch (or a plan for not having one)
A winch is the ultimate self-recovery tool — it pulls you out when there’s no second vehicle and boards aren’t enough. But it’s also $800–$2,000+ fitted, adds 30–40kg to the front of your vehicle (hello, GVM and suspension), and requires a winch-compatible bullbar.
For outback touring on established tracks with a second vehicle or regular traffic, boards + straps + a compressor cover 95% of situations. For solo remote travel, the winch moves to Tier 1. If you fit one, learn to use it properly — winching is the most dangerous recovery technique, and a recovery damper (see below) is mandatory.
7. Tree trunk protector + winch extension strap
If you winch off a tree, a tree trunk protector (a wide, flat strap) spreads the load and doesn’t ringbark the tree like a wire rope or narrow strap would. A winch extension strap adds reach when the nearest anchor is further than your winch rope. Both are cheap (~$50–$100 each) and live permanently with the winch kit.
8. Snatch block
A snatch block (pulley block, ~$83 for ARB’s 7000kg unit) doubles your winch’s pulling power and lets you change the pull direction — essential when the only anchor isn’t straight ahead. It halves the load on the winch and doubles the cable you can spool out. Small, relatively cheap, and transformative for winch recoveries.
9. Recovery damper
A weighted damper draped over a strap or winch cable during recovery absorbs energy if something fails — instead of a strap or shackle flying, it drops to the ground. Non-negotiable for winching; strongly recommended for snatch recoveries. Purpose-made dampers are ~$40–$60; a heavy blanket or canvas bag works in a pinch, but a proper damper is better.
10. Gloves and a shovel
Recovery gloves (~$20–$30) protect your hands from wire rope splinters, hot shackles, and general bush abuse. A long-handled shovel is the most underrated recovery tool in existence — ten minutes of digging around the tyres and under the chassis often achieves what an hour of winching can’t. A $30 shovel has recovered more vehicles than all the fancy gear combined.
Tier 3: Nice to Have
- Tyre repair kit + spare valves: outback tracks eat tyres. A plug kit, spare valve cores, and the knowledge to use them (~$50) can save a trip. Two spares for truly remote travel.
- High-lift jack: useful for lifting a bogged vehicle to pack material under the wheels, but dangerous without training and proper jacking points. A bottle jack with a wide base is safer for most people.
- Exhaust jack (air bag jack): inflates from your exhaust to lift the vehicle on soft ground where a normal jack sinks. Brilliant in sand, useless without practice.
- Ground anchor: for when there’s genuinely nothing to winch from (looking at you, Nullarbor and Simpson Desert). Expensive and heavy, but the only option in treeless country.
- Hand winch (Tirfor-style): slow, heavy, exhausting — but works with no vehicle power and pulls in any direction. A legitimate backup for solo remote travellers.
What NOT to Use
Never recover from a tow ball. This deserves its own section because people still die doing it. Tow balls are designed for downward towing loads, not the horizontal shock loading of a snatch recovery. Under snatch loads they can shear off and become a lethal projectile — there are documented fatalities in Australia. Use rated recovery points. If your vehicle only has a tow ball at the rear, fit a recovery hitch receiver (a rated shackle block that slides into the tow hitch, ~$80–$120) before you need it.
Also avoid: unrated shackles, tow straps (non-stretch) for snatch recoveries, chains for kinetic recoveries, and attaching straps to bullbars, nudge bars, or suspension components that aren’t rated recovery points.
The Recovery Sequence: What to Do When You’re Bogged
Gear without technique is just expensive ballast. When you’re stuck:
- Stop. The moment you realise you’re losing momentum, stop. Spinning the wheels digs you deeper — every rotation makes the recovery harder.
- Assess. Get out, look at what’s holding you. Is it soft sand? A chassis on a mound? A wheel in a rut? The fix depends on the cause.
- Deflate. Drop tyre pressures — 18psi is a starting point for sand, down to 12–14psi for soft stuff (see our sand driving guide for the full chart). This alone fixes most bogging.
- Dig. Clear sand/mud from in front of and behind the tyres, and from under the chassis if it’s bellied out. Ten minutes with a shovel beats an hour of winching.
- Boards. Wedge recovery boards firmly under the drive wheels, as flat and as far under as you can get them.
- Drive out gently. Low range, second gear, gentle throttle. Let the boards do the work — spinning wheels melt the cleats.
- Snatch only if needed. If boards and digging fail, set up a snatch recovery with damper, clear the area of bystanders (1.5× strap length minimum), and use the minimum force necessary.
- Re-inflate. Before driving on, pump back up to road pressures. Driving on soft tyres at speed destroys them.
If you’re genuinely stranded — vehicle immobilised, no passing traffic, remote area — the rules change entirely. That’s covered in our outback breakdown safety guide: stay with the vehicle, conserve water, and signal for help.
Identifying Rated Recovery Points
The most dangerous recovery mistake isn’t the wrong strap — it’s the wrong anchor point. Not everything solid-looking on your vehicle is a recovery point:
- Rated recovery points are specifically designed and tested for snatch loads — typically rated to 5,000kg+ each. Aftermarket points (ARB, Ironman, and others make vehicle-specific kits) bolt to the chassis with high-tensile hardware. If your 4WD doesn’t have them, this is the first recovery purchase to make — before the strap.
- Tow balls are not recovery points. This is the big one. Tow balls are designed for static towing loads, not the shock loading of a snatch recovery. They can — and do — snap off and become lethal projectiles. Never attach a snatch strap to a tow ball. Use the tow hitch receiver with a rated recovery hitch insert instead.
- Tie-down points are not recovery points. The small loops used for securing vehicles during transport are for tie-down, not snatching. They’ll deform or tear under recovery loads.
- Bullbar mounts vary. Some bullbars have rated recovery points integrated; many don’t. Check with the manufacturer — “looks strong” isn’t a rating.
- Use two points with an equaliser strap where possible. A bridle/equaliser strap spreads the load across both chassis rails instead of concentrating it on one side, and it gives a centred pull.
When buying a used 4WD for touring, check the recovery points on inspection day. Missing or damaged points are a negotiating point — and a job to fix before the first trip, not during it.
Frequently Asked Questions
What is the most important recovery gear for outback touring?
Rated recovery points, a correctly-rated snatch strap, rated shackles, recovery boards, and a tyre deflator plus air compressor. Those five items handle the vast majority of bogging situations. Everything else is situational.
What size snatch strap do I need?
Minimum breaking strength of 2–3 times your vehicle’s GVM, matched to the lighter of the two vehicles in the recovery. For a 3-tonne touring 4WD, an 8,000kg strap is the standard. The strap must comply with the Australian Consumer Goods (Motor Vehicle Recovery Strap) Safety Standard 2017.
Are recovery boards worth it?
Absolutely — they’re the best value in recovery gear. A pair of Maxtrax (~$250) enables self-recovery from sand, mud, and snow with no second vehicle, and handles situations where a strap can’t help. Most experienced tourers rate boards above a winch for typical touring.
Can I use my tow ball as a recovery point?
No — never. Tow balls are not designed for the shock loading of a snatch recovery and can shear off, becoming a lethal projectile. There have been fatalities in Australia from this. Use rated recovery points or a recovery hitch receiver.
Do I need a winch for outback touring?
Not necessarily. On established outback tracks with regular traffic or a second vehicle, recovery boards, straps, and a compressor cover nearly all situations. A winch becomes important for solo remote travel or serious off-track work — but it adds significant cost, weight, and requires proper training.
← Back to our complete guide: Best Roof Racks for 4WD Touring Australia 2026